In this article we will look at step by step installation of NS2 on Windows 7/8.1/10/11 using a third-party software named Cygwin.
Note: The below installation process was verified in Windows 8.1 and Windows 10. It might work for Windows 7 and Windows 11 also.
Watch this video to learn installation of NS2 for Windows 7/8.1/10/11:
STEP 1
Download the installation files from the following Google Drive link:
Link: Download NS2
STEP 2
Extract the ZIP file and you should see the following files/folders:
- Noureddine
- nslocal
- Others Files
- exe
STEP 3
Installing Cygwin application.
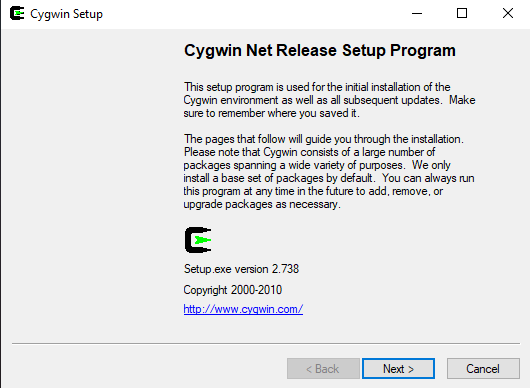
Open “setup.exe” file. You will see the following window:
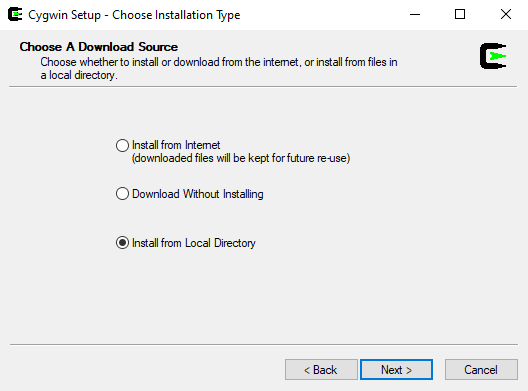
Click on “Next” and choose “Install from Local Directory” as shown below and click on “Next”.
Leave the settings as it is in the next screen and click on “Next”.
Note: Don’t change the default location from “C:\cygwin” to something else.
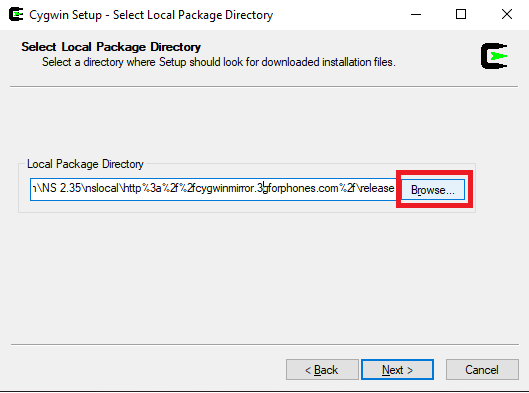
In the “Local Package Directory”, click on “Browse” as shown below.
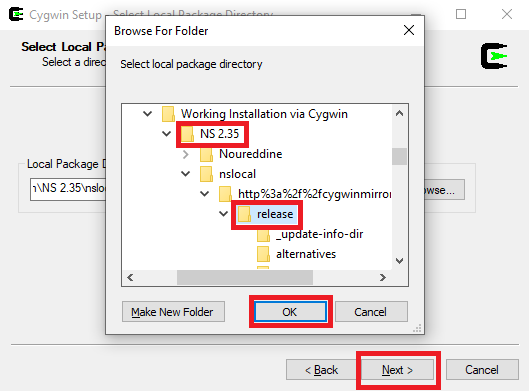
In the browse folder window, select “release” folder under the extracted “NS 2.35” folder and click on “OK” and then click on “Next” as shown below:
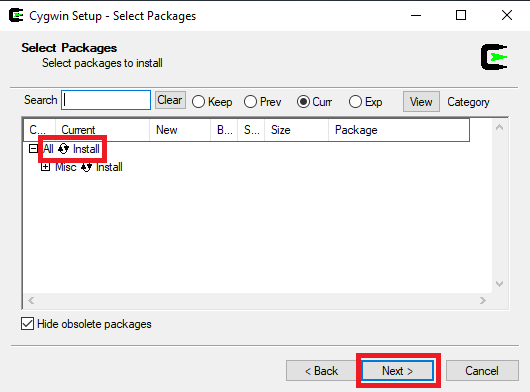
In the “Select Packages” window, change “Default” to “Install” by click the arrows symbol and then click on “Next” as shown below:
Now, the installation will take some time to finish and you will see a screen as shown below:
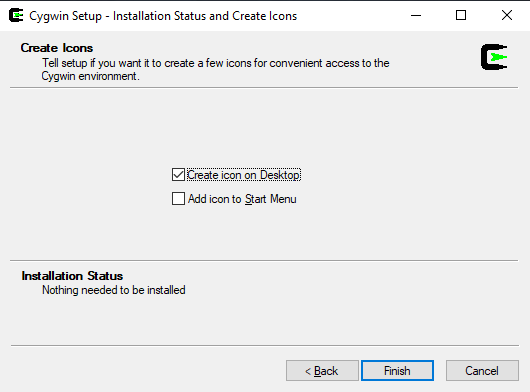
Check the option “Create icon on Desktop” and click on “Finish” to complete the installation.
STEP 4
Install Xming.
Open Google in a browser and type “Xming Download” or go to this URL https://sourceforge.net/projects/xming/ and click on the “Download” button.
After downloading Xming, install it.
STEP 5
Copy paste the folder named “Noureddine” from the extracted “NS 2.35” folder to the “home” directory at the location “C:\cygwin\home”.
STEP 6
Setting up environment variables.
Open the “.bashrc” file (at the location C:\cygwin\home\Admin) in a text editor like Notepad or Wordpad and insert the following lines at the end of the file and save it.
Note: In the above path, the “Admin” may be some other username on your system. On my PC, the username is “Admin”. Likewise, on your PC, it might be another username.
#Change this value based on the path in your system
export NS_HOME=/home/Noureddine/ns-allinone-2.35-RC7
# LD_LIBRARY_PATH
OTCL_LIB=$NS_HOME/otcl-1.14
NS2_LIB=$NS_HOME/lib
X11_LIB=/usr/X11R6/lib
USR_LOCAL_LIB=/usr/local/lib
export LD_LIBRARY_PATH=$LD_LIBRARY_PATH:$OTCL_LIB:$NS2_LIB:$X11_LIB:$USR_LOCAL_LIB
# TCL_LIBRARY
TCL_LIB=$NS_HOME/tcl8.5.8/library
USR_LIB=/usr/lib
export TCL_LIBRARY=$TCL_LIB:$USR_LIB
# PATH
XGRAPH=$NS_HOME/bin:$NS_HOME/tcl8.5.8/unix:$NS_HOME/tk8.5.8/unix
NS=$NS_HOME/ns-2.35/
NAM=$NS_HOME/nam-1.15/
export PATH=$PATH:$XGRAPH:$NS:$NAM
STEP 7
Running example tcl file.
Note: Before proceeding further, check whether Xming software is running or not. If it is running you can see its icon in the system tray. If it is not in the system tray, you have to start/run it.
Open Cygwin terminal (black window) by clicking on the desktop shortcut.
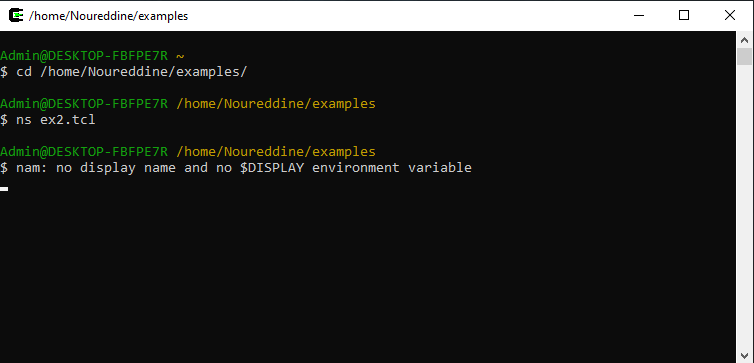
Navigate to “examples” folder by using the following command:
Use the following command to run the tcl file:
You might not see the output nam window and might see a error message as shown below:
Now, use the following command at the terminal and hit Enter key:
Rerun the tcl file by using the command “ns ex2.tcl”.
Now, you should be able to the nam output window as shown below:
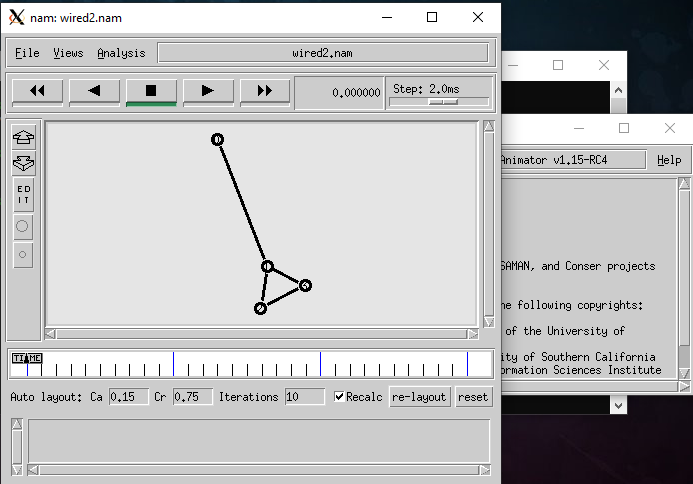
If you are able to see the above windows, you have successfully installed ns2 through Cygwin.
Download NS2 installation procedure for Windows 7, 8.1, 10, and 11 for distributing them as handouts to your students.
References
- https://stackoverflow.com/questions/38770250/nam-network-animation-console-is-not-comming-in-ns2
- https://askubuntu.com/questions/40779/how-do-i-install-a-deb-file-via-the-command-line
- https://superuser.com/questions/1713550/wsl2-wont-use-xming-on-windows-11
Suryateja Pericherla, at present is a Research Scholar (full-time Ph.D.) in the Dept. of Computer Science & Systems Engineering at Andhra University, Visakhapatnam. Previously worked as an Associate Professor in the Dept. of CSE at Vishnu Institute of Technology, India.
He has 11+ years of teaching experience and is an individual researcher whose research interests are Cloud Computing, Internet of Things, Computer Security, Network Security and Blockchain.
He is a member of professional societies like IEEE, ACM, CSI and ISCA. He published several research papers which are indexed by SCIE, WoS, Scopus, Springer and others.
Leave a Reply