Following are instructions for installing OpenStack (ocata) on Ubuntu 16.04 LTS VM.
When creating Ubuntu VM, the RAM size must be at least 4GB. Otherwise, OpenStack may show errors while installing.
Add user named “stack” using the following command:
sudo useradd -s /bin/bash -d /opt/stack -m stack
Assign no password for the username “stack” using the following command:
echo “stack ALL=(ALL) NOPASSWD: ALL”| sudo tee /etc/sudoers.d/stack
Open “/etc/network/interfaces” using Vim or any other text editor and assign a static IP, by typing the following below “primary network interface”:
iface eth0 inet static #eth0 changes from system to system
address 10.253.0.50
netmask 255.255.255.0
gateway 10.253.0.1
dns-nameservers 8.8.8.8 8.8.4.4
Change current user to “stack” using the following command:
sudo su – stack
Now, install cloud initialization script using the following command:
sudo apt-get install cloud-init
Download Openstack ocata from git using the following command:
git clone https://git.openstack.org/openstack-dev/devstack -b stable/ocata
If you get a TLS error at the above step, try changing https to http and try again. It worked for me.
Change to “devstack” directory using the following command:
cd devstack
Create a “local.conf” file with the following contents:
‘[[local|localrc]]’
ADMIN_PASSWORD=password
DATABASE_PASSWORD=password
RABBIT_PASSWORD=password
SERVICE_PASSWORD=password
This step is optional. Do this only when you encounter error with the next step.
sudo vim /etc/apt/sources.list
Remove all lines which contain “cdrom”
Finally, execute “stack.sh” file using the following command:
./stack.sh
It will take around more than 20 mins based on your internet speed and other factors. For me it took approx. 3 to 4 hours.
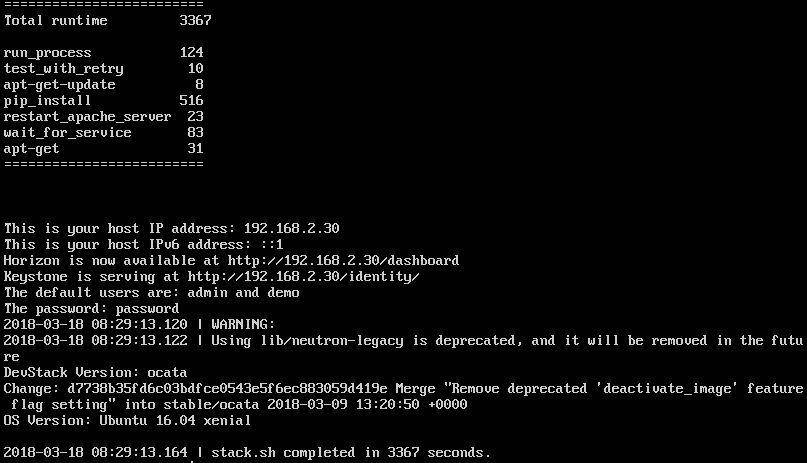
After installation is completed, you can see the URL for accessing the horizon dashboard and other information as shown in the image below:
That’s it! You have installed your own cloud environment using OpenStack. 🙂

Suryateja Pericherla, at present is a Research Scholar (full-time Ph.D.) in the Dept. of Computer Science & Systems Engineering at Andhra University, Visakhapatnam. Previously worked as an Associate Professor in the Dept. of CSE at Vishnu Institute of Technology, India.
He has 11+ years of teaching experience and is an individual researcher whose research interests are Cloud Computing, Internet of Things, Computer Security, Network Security and Blockchain.
He is a member of professional societies like IEEE, ACM, CSI and ISCA. He published several research papers which are indexed by SCIE, WoS, Scopus, Springer and others.


OpenStack is a cloud controller software. Though the community did a nice job at putting together this software, an instance of an OpenStack installation does not make a cloud. As an operator you will be dealing with many additional activities not all of which users see. These include infra onboarding, boostrapping, remediation, config management, patching, packaging, upgrades, high availability, monitoring, metrics,