Today I was trying to add OpenCV library to my Android app by following the instructions in this video.
Downloaded OpenCV 3.4 and added to the Android app. After adding it to the app, several (45) errors popped up, among which the major error was:
error: package android.hardware.camera2does not exist
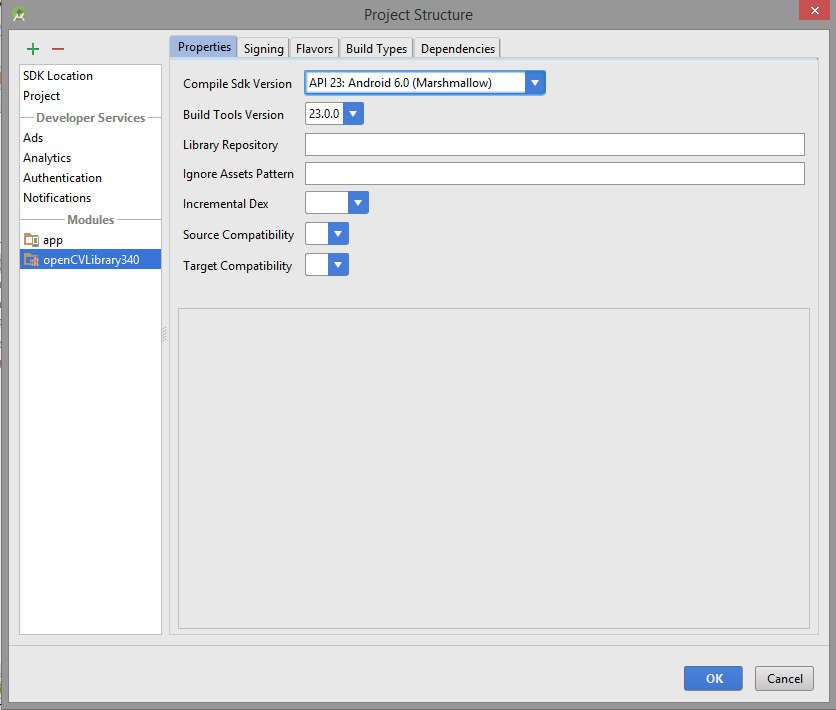
I solved this problem by changing the project settings. To get the project settings dialog, press CTRL+ALT+SHIFT+s. Then change the values as shown in the following figure:
After doing the above changes, to my surprise, all other errors were also gone! 🙂
After a while, my Android app encountered another error while it was building the project. The error is as follows:
Error:Execution failed for task ‘:app:compileDebugNdk’.
> NDK not configured.
Download the NDK from http://developer.android.com/tools/sdk/ndk/.Then add ndk.dir=path/to/ndk in local.properties.
(On Windows, make sure you escape backslashes, e.g. C:\\ndk rather than C:\ndk)
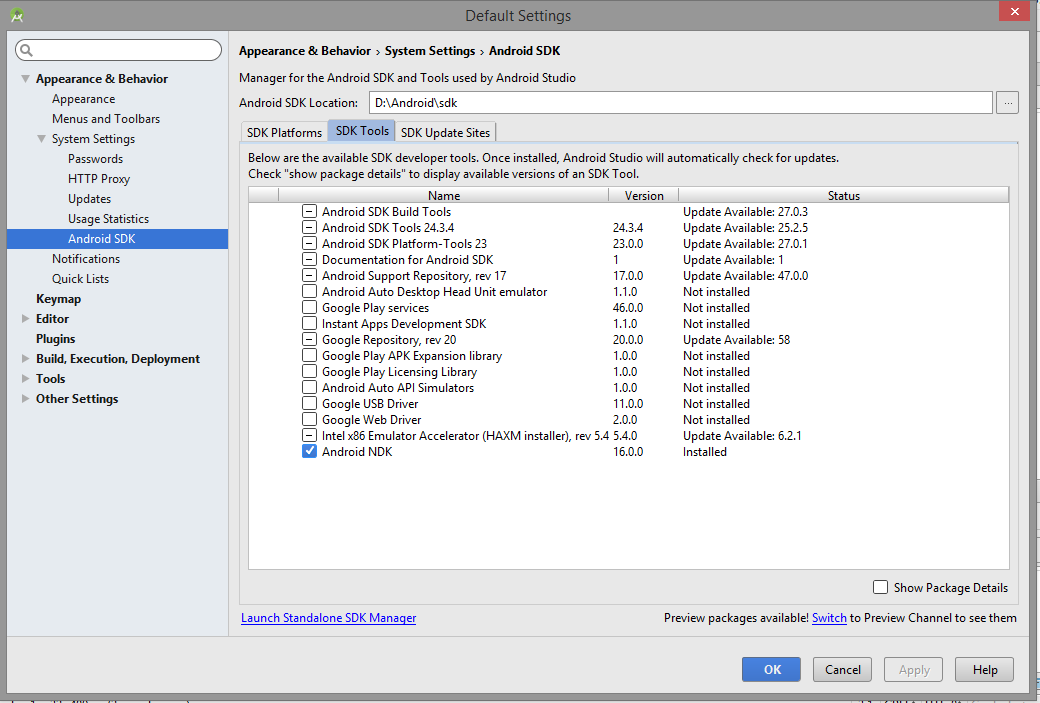
To resolve the above error I installed Android NDK, by opening SDK Manager and selecting SDK Tools tab as shown in the below image:
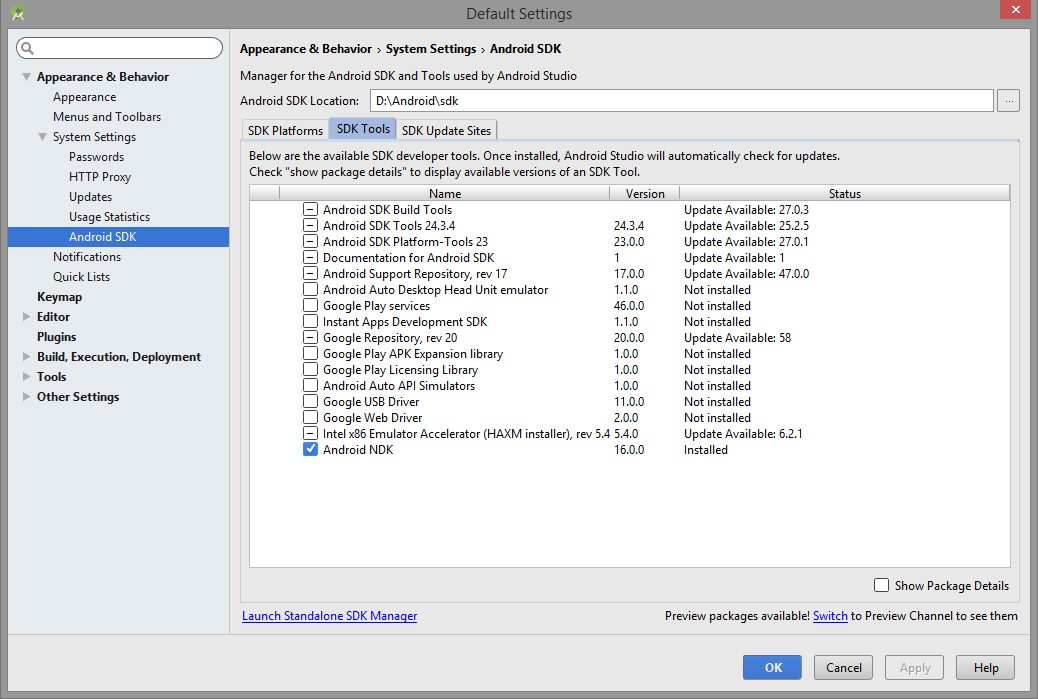
Now, select Android NDK and click on Apply button. It will take a while to download and install Android NDK. After that it will show the tool with installed status as shown in the below image.
Then click OK button.
Even after installing the Android NDK, it was showing the same error message. What I did to resolve the above error is:
Open build.gradle (Module:app) file in Android Studio and search for the following code:
sourceSets { main { jni.srcDirs = ['src/main/jni', 'src/main/jniLibs/'] } }
and change it to the following code:
sourceSets { main { jni.srcDirs = ['src/main/jniLibs/'] } }
After the making the above change, finally the build succeeded without any errors. 🙂

Suryateja Pericherla, at present is a Research Scholar (full-time Ph.D.) in the Dept. of Computer Science & Systems Engineering at Andhra University, Visakhapatnam. Previously worked as an Associate Professor in the Dept. of CSE at Vishnu Institute of Technology, India.
He has 11+ years of teaching experience and is an individual researcher whose research interests are Cloud Computing, Internet of Things, Computer Security, Network Security and Blockchain.
He is a member of professional societies like IEEE, ACM, CSI and ISCA. He published several research papers which are indexed by SCIE, WoS, Scopus, Springer and others.


At the time of using the OpenCV Android application, it has also arisen with the error code 0xc000000f and it has fallen down to working on, So, I need some solutions over that.
Hi Nick,
I don’t know why that error is showing up. It is better if you post your problem on stackoverflow website.