Download Java Development Kit 8 (JDK 8) from this link.
Alternatively you can download only the Java Runtime Environment (JRE) from this link.
In this tutorial I will be installing JDK 8 as this also installs JRE 8.
System specification:
Operating System: Windows 8.1 64 bit
Processor: Intel core i3 64 bit
Step – 1:
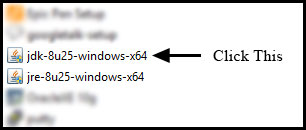
Double click the jdk-8u25-windows-x64.exe icon as shown in the below screen shot:
Step – 2:
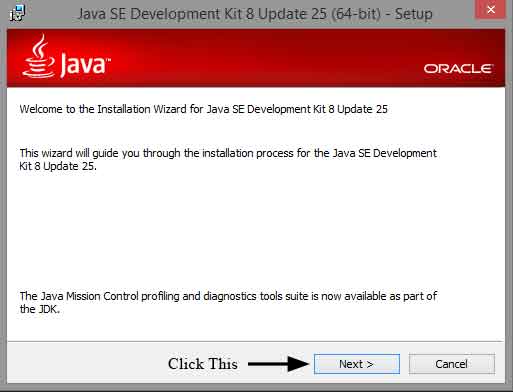
The first screen you will see is the setup welcome screen as shown in the below screen shot. Click Next button.
Step – 3:
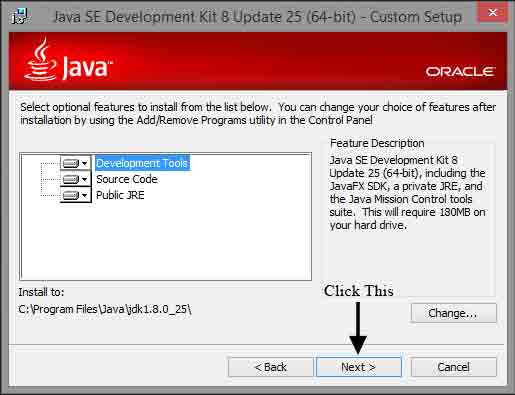
In the next screen you will see custom options like selecting the necessary features and the path at which we want to install JDK8. Leave them in their default settings and click Next button as shown in the below screenshot:
Step – 4:
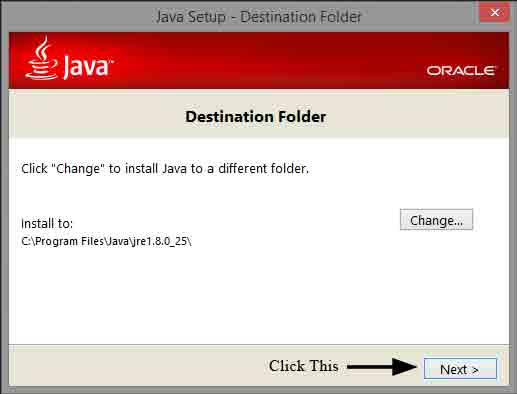
In the next screen you can select the path at which JRE8 can be installed. Leave it at its default path and click on Next button as shown in the below screenshot:
Step – 5:
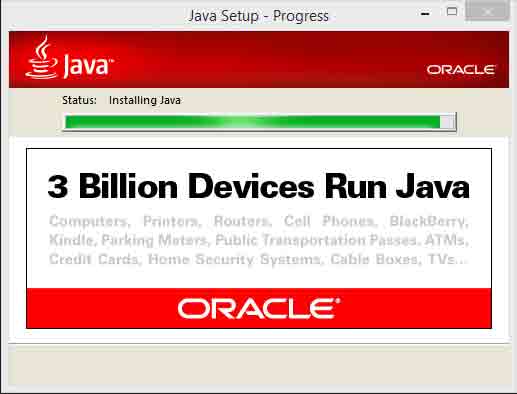
In the next screen you can observe the installation progress (green bar) as shown in the below screenshot:
Step – 6:
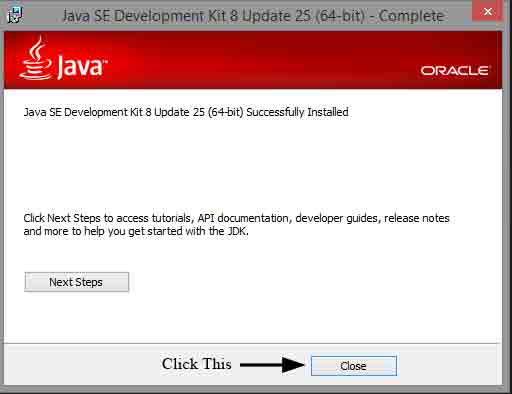
Next you will see the installation completion screen. Click on Close button as shown in the below screenshot:
That’s it! You have installed JDK8 successfully on your machine. 🙂
Download this tutorial in PDF format here.

Suryateja Pericherla, at present is a Research Scholar (full-time Ph.D.) in the Dept. of Computer Science & Systems Engineering at Andhra University, Visakhapatnam. Previously worked as an Associate Professor in the Dept. of CSE at Vishnu Institute of Technology, India.
He has 11+ years of teaching experience and is an individual researcher whose research interests are Cloud Computing, Internet of Things, Computer Security, Network Security and Blockchain.
He is a member of professional societies like IEEE, ACM, CSI and ISCA. He published several research papers which are indexed by SCIE, WoS, Scopus, Springer and others.

Leave a Reply