This article provides guide for step by step Installing Eclipse on Ubuntu
Pre-Installation Note: It is assumed that you have already installed JDK 7 or higher.
- Download Eclipse from its website:
- Extract Eclipse to /opt/ for global use:
cd /opt/
sudo tar -zxvf ~/Downloads/eclipse-*.tar.gz
You may replace “eclipse-*.tar.gz” (without quote) to the exact package name if the command does not work.
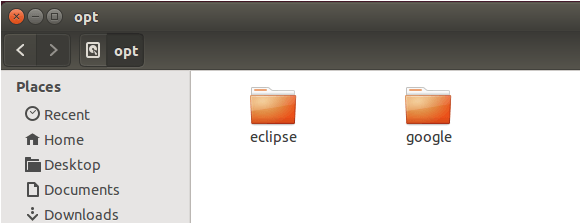
Once done, you should see the eclipse folder under /opt/ directory as shown below:
- Create a launcher shortcut for Eclipse:
Paste below command into the terminal and hit enter.
gksudo gedit /usr/share/applications/eclipse.desktop
Above command will create and open the launcher file for eclipse with gedit text editor.
Paste below content into the opened file and save it.
[Desktop Entry] Name=Eclipse 4Type=Application
Exec=/opt/eclipse/eclipse
Terminal=false
Icon=/opt/eclipse/icon.xpm
Comment=Integrated Development Environment
NoDisplay=false
Categories=Development;IDE;
Name[en]=Eclipse
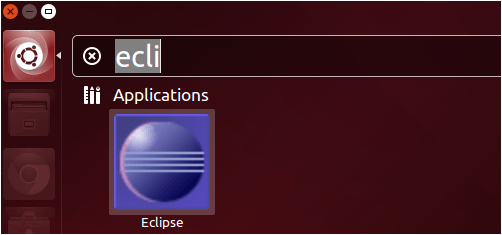
- Finally open Eclipse from Unity Dash search results and enjoy!
- Congratulations! You have installed Eclipse successfully.
Download the above instructions in PDF format here
For more detailed instructions, visit: http://ubuntuhandbook.org/index.php/2014/06/install-latest-eclipse-ubuntu-14-04/

Suryateja Pericherla, at present is a Research Scholar (full-time Ph.D.) in the Dept. of Computer Science & Systems Engineering at Andhra University, Visakhapatnam. Previously worked as an Associate Professor in the Dept. of CSE at Vishnu Institute of Technology, India.
He has 11+ years of teaching experience and is an individual researcher whose research interests are Cloud Computing, Internet of Things, Computer Security, Network Security and Blockchain.
He is a member of professional societies like IEEE, ACM, CSI and ISCA. He published several research papers which are indexed by SCIE, WoS, Scopus, Springer and others.


Leave a Reply